Click Photos to Enlarge
 |
| Walnut Keepsake Box |
I built this keepsake box to showcase contrasting woods and exposed joinery. To improve the photography, I recently purchased a 50mm lens for my Canon DSLR camera. This allows more creative control of the depth of field to blur the background and enable the subject to stand out.
The box is made from 4/4 walnut that was surfaced to half an inch. The exposed splines on the corners are made of maple.
The box is made from 4/4 walnut that was surfaced to half an inch. The exposed splines on the corners are made of maple.
 |
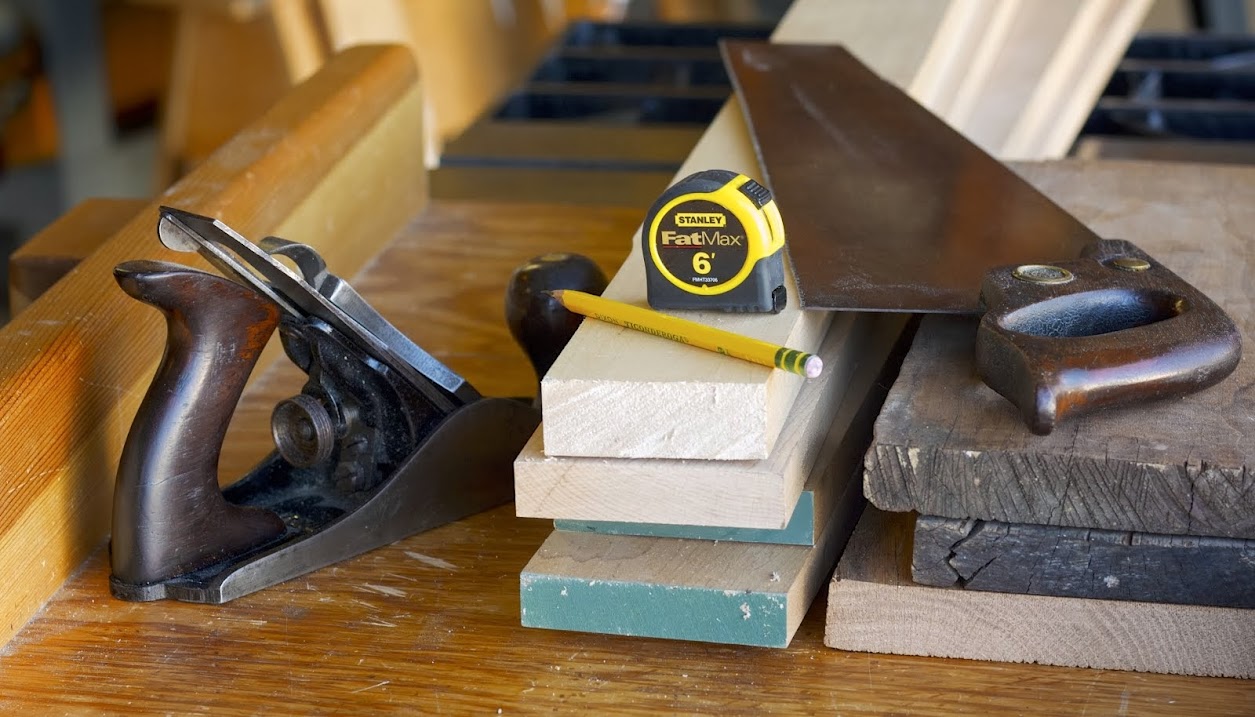
| Rough Cutting Walnut Stock |
After drawing the plan and calculating dimensions, I cut the walnut to rough lengths or lengths slightly larger than required. I enjoy using hand tools for this step because I like the "old school" feel to woodworking.
 |
| Grooves for the Offset Box Lid |
After the parts were sized, grooves were cut along the length of the parts. This facilitates the offset lip on the box that seats the lid in place. After the grooves were cut, the parts were cut to finish lengths with 45 degree miters on the ends using the power miter saw.
 |
| Box Sides Glued and Ready for Assembly |
The next step was gluing and clamping. Clear packing tape was laid out on the workbench with the sticky side up. The pieces were laid out end to end and aligned with a straight edge on to the tape. Glue was then applied to the mitered ends. The pieces were formed in a rectangular box shape clamped with the packing tape. The tape was removed a couple of hours later and the glue was allowed to cure overnight. This was my first experience gluing and clamping using this method and I was pleasantly surprised how easy and efficient it was.
 |
| Splined Miter Slots |
 |
| Slot Cutting Jig for the Table Saw |
After the glue cured, two slots were cut on each corner of the box to accommodate the maple splines. Miter joints
are typically not very strong. Strength to the miter joints was added by the splines in addition to the decorative look. It was necessary to build a jig for the box corner to be held in place for the cut made by the dado blades. The box was held in place in the 90 degree "V," then guided in the jig through the blades with the rails that fit in the table slots parallel to the blades.
The maple triangular splines were cut slightly oversize, glued and sanded to fit flush with the box sides.
The maple triangular splines were cut slightly oversize, glued and sanded to fit flush with the box sides.
 |
| Top and Bottom Glued to the Box |
 |
| Edge Trimmed Flush on the Router Table |
 |
| Lid Cut from the Box |
I rounded over all edges of the box with a 3/8" radius round over router bit set up on the router table. The box was sanded progressively with 120 grit, 150 grit and 180 grit sand paper to a smooth clean surface.
Walnut has its own natural color, so a simple clear satin finish was all that was necessary. Three coats of satin polyurethane gel was used to give the walnut a rich warm look.