Craftsmanship in a Garage

Craftsmanship in a Garage

Tuesday, January 24, 2012

Quilt Top Keepsake Box


Click photos to enlarge.


I recently built this keepsake box that is inspired by Early American quilts. The "tumbling block" effect is created by assembling small wood blocks in a geometric pattern. Each piece is cut from a different type of wood and laid into a recess on the lid so the grain and color add distinction to the pattern.

Plans and Materials for the Keepsake Box
I found the plan for the box in an issue of a woodworking magazine that I subscribe to. The instructions and drawings were pretty clear and with some left over materials from previous projects, I got started. The box sides and ends are maple and the top and bottom are made from 1/4" birch veneer plywood. I used cherry, walnut and maple for the quilt pattern.


Mitered Joint Reinforced with a Spline 
The first step was to plane the thickness and to cut the sides and ends to the finish width. Next, grooves were cut to accommodate the top and bottom and for the lid to interlock with the box to hold it in place. The sides and ends were cut to length with a 45 degree miter on each end. For the box to be square, the opposite sides needed to be the exact same length. The miter joints that join the box are reinforced with splines that fit into slots cut on the ends of the pieces. Miter joints are typically not a very strong joint, so the spline adds strength and helps with alignment.

Router Set Up for Cutting Spline Slots 
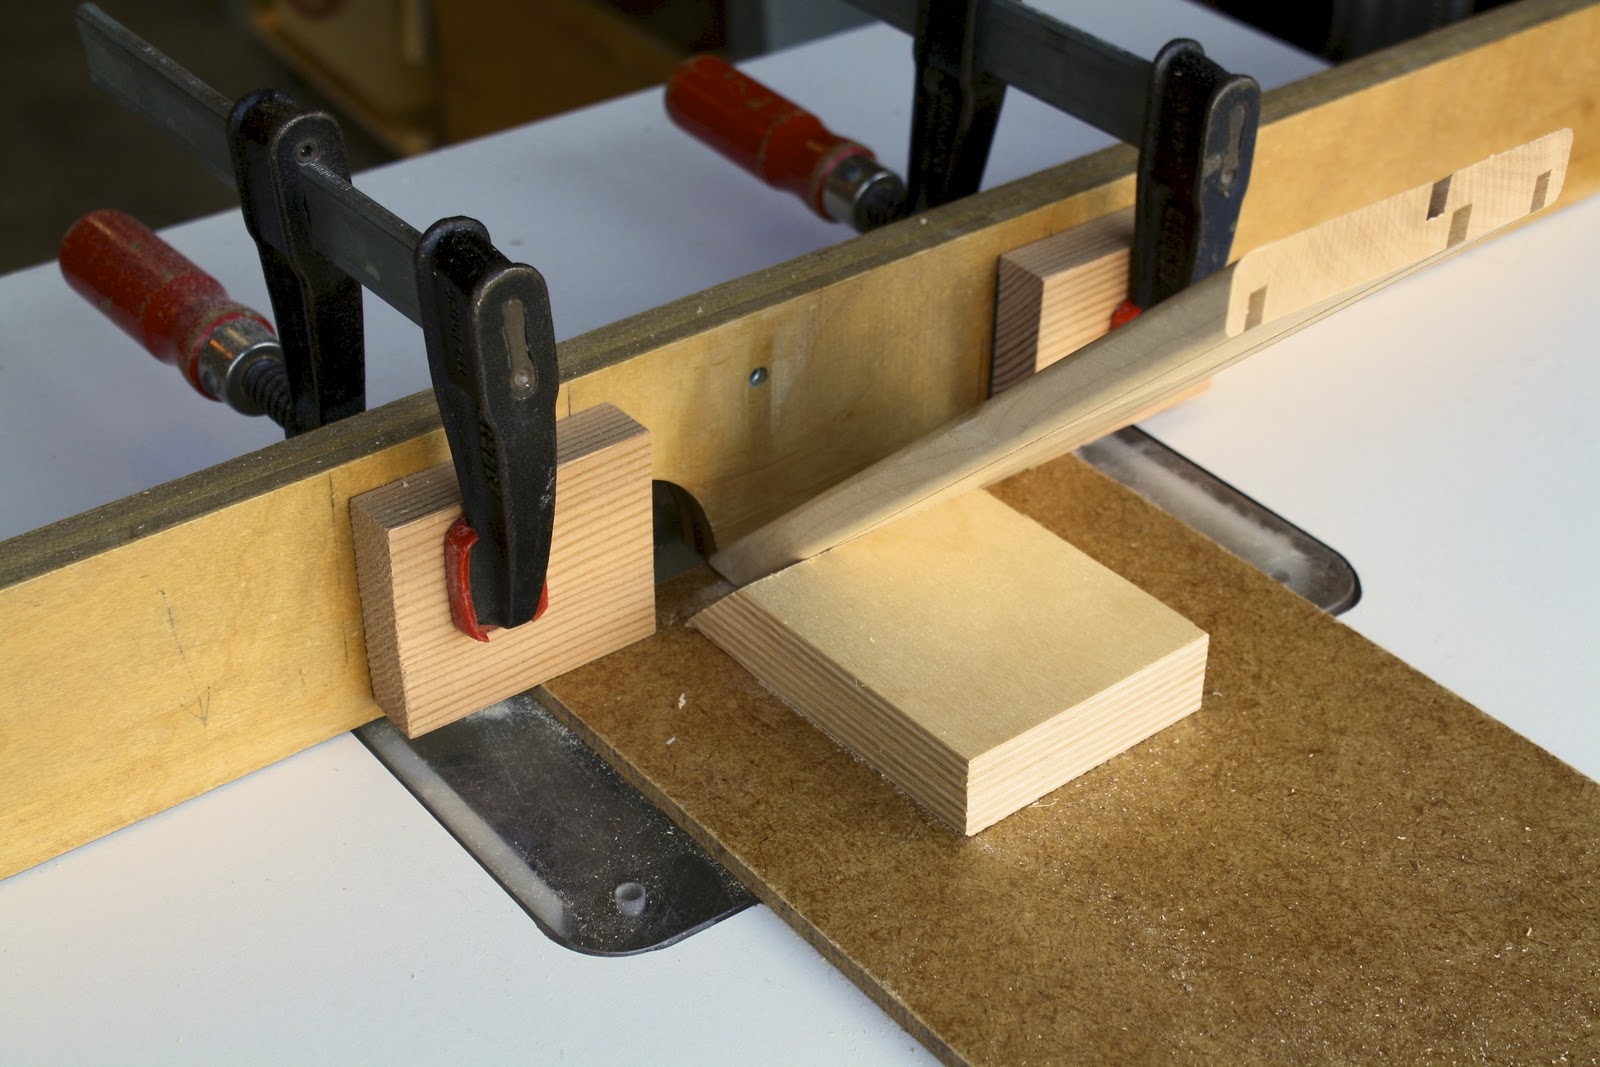
Spline Slot Cutting on the Miter Joint
The slot was cut with a 1/8" diameter straight router bit. The bit was set to cut a 1/4" depth on the router table. The mitered end was lowered into the bit against the stop block and fed to the opposite stop block.

Glued Up Box
Gluing and clamping was fairly easy since the lid was cut from the box later. The folding rule was used to measure the box diagonally. If the two diagonals are equal then the corners are 90 degrees or square...something I remember from 10th grade geometry class many years ago.

Interlocking Lid and Bottom
Once the glue dried on the box, the next step was to cut the lid free with the table saw. Four cuts were made around the box between two opposite offset grooves to form the interlocking lid. 

Cutting a "Tumbling Block" Piece on the Table Saw with the Miter Gage
After the box was completed, the next step was to cut the various parts to create the "tumbling block" quilt effect. The blocks were cut to squares, rectangles, triangles, diamond shapes and parallelograms. The table saw with a sled attached to the miter gauge was used to cut the various shapes. Sandpaper glued to the sled kept the pieces in place. The pencil eraser held the pieces securely against the fence without getting fingers too close to the blade.

Rounding Over Pieces With a "Zero Clearance" fence on the Router Table

Fitting the blocks to form the Quilt Pattern
After the pieces were cut and fit to form the "tumbling block" quilt pattern, they were numbered and rounded over with a 1/8" radius round-over router bit. Because the pieces were so small, a special "zero clearance" fence was made and fastened to the router table with double sided tape. The purpose of the rounded edges was to create a "shadow" line to hide any edges the don't fit perfectly together. The pieces were then sanded and glued in place.

The box was sanded with 120 grit and 180 grit to a clean smooth surface. I applied three coats of tung oil to create a traditional hand rubbed finish.

Building the box with an intricate pattern on top was an exercise in patience and a fun challenge to my woodworking skills. It has already provided interesting conversation.

Friday, January 20, 2012

Jigs and Fixtures

Jigs and Fixtures are work-holding or support devices that I often use in woodworking.  
In some cases they are used to safely guide a tool or workpiece to a correct position. They can be used to enable multiple parts to be made to the same specification. Basically, they are used to maintain quality and maximize efficiency.


Click the photos to enlarge.
Workpiece Set Up in Dado Jig with Center Board
The dado joint jig is designed to guide the plunge router to cut perfectly straight dado and groove joints in the correct location. The work piece is set up in the frame with the center board used to align the center of the joint. Care is taken to securely clamp the jig and workpiece for safety and accuracy.

Plunge Router Set Up in Dado Jig

The plunge router is placed between the rails at the end of the joint, then lowered to the preset depth of a quarter inch and pulled to the opposite end.

Completed Dado Joint
Perfectly straight and uniform dado joints are cut to receive the adjoining pieces for strength and alignment.

Table Saw Crosscut Sled
I recently modified my crosscut sled to make it a little more efficient to improve accuracy. The sled makes crosscutting large pieces on the table saw much easier and safer. I extended the rear rail to add more support when cutting long pieces.


Tenon Jig
I like to use mortise and tenon joinery on some my woodworking projects. This jig makes cutting the tenon much easier and accurate. The box is attached to the miter jig that is square to the blade. Multiple passes are made with the final pass made with the end resting against the adjustable stop block.

Belt Sander Fixture
Sanding Curves with Belt Sander
This fixture is one of my favorites. Sanding convex curves evenly has been a challenge. I looked into purchasing a belt/disc sander and they range from 120 to 200 dollars. I have a portable belt sander and with a few pieces of scrap lumber I fashioned a stationary sanding machine that meets my needs. Money saved!

Wednesday, December 7, 2011

SJFWA Christmas Toy Project 2011

The San Joaquin Fine Woodworkers Assn has once again crafted 6,000 Christmas toys for disadvantaged children here in the San Joaquin Valley. I've been helping since August both with the group and at home. A lot of folks donate time and money to this very worthwhile  community project. 

Doll Cradle Ends Cut, Shaped, and Sanded


Sunday, November 13, 2011

Guylan's Toddler Stool

I built another toddler stool for the grandson of our close Nashville friends, Jackie and Scott. He seems pretty happy with his new piece of furniture.


Guylan 

Tuesday, November 8, 2011

Wedding Keepsake Boxes


Our daughter in law, Amy asked if I could build a box that would be placed by the guest book to collect cards at the wedding in San Francisco this past September. I chose cherry wood because of it's rich warm look. In time, it develops a beautiful patina that can't be duplicated. 

Three weeks later, the daughter of close family friends, Sarah Cantlon, was married in St Louis. It seemed appropriate to build a similar box to take as a wedding gift.

Both brides are very appreciative and feel it's a wonderful way to store and  
cherish wedding keepsakes. 


Saturday, July 16, 2011

Box Making


Wood Carving Tool Box

Knick-Knack Box

This spring, I built a couple of boxes using box joinery and jig from my November 22 post. The tool box was built for my collection of wood carving tools. The knick-knack box was built for fun out of scraps from the toddler stool project built this winter.

I selected some pieces of red oak lumber for the tool box. The first step was to cut and surface the boards to size. The next step was to cut the pins and slots to assemble the sides and ends.  The table saw and box joint jig were used for this operation.

Red Oak Cut To Size

Box Top & Bottom Parts Prepared for Edge Gluing

Often it is necessary to cross-cut a wide panel to length and square. The panel is too wide for the power miter saw. It's too narrow to be safely supported with the table saw fence and too large to be safely supported with the table saw miter gauge. A cross-cut sled is commonly used to safely support the panel while cutting exact 90 degree cross-cuts. There are numerous variations of sleds that can be used. The homemade one I use is basic and functional. The panel is supported on the sled with a fence 90 degrees square to the blade. The rail on the underside guides the sled while keeping the 90 degree cross-cut. Mine is 20 plus years old and still delivers accurate square cuts safely.

Table Saw Cross-Cut Sled

Prior to gluing I always make a "dry fit" to check that all the joints are cut correctly. Also, I check that everything fits properly and the box is square. After I applied the glue, the box was clamped and allowed to dry. Masking tape was applied to the inside ends of each part so that any glue that was squeezed out could be easily removed.

Tool Box Glued & Clamped

The top and bottom were glued and clamped to the box. The pieces were cut slightly over sized so they  could easily be trimmed with the router for a flush exact fit with the box sides and ends.

Top & Bottom Glued and Clamped to the Box

Bottom Edges Trimmed with a Flush Trim Router Bit

After the lid was cut off using the table saw and some final sanding, the finish was applied. I applied a coat of Watco walnut danish oil and three coats of gel polyurethane finish. As I have mentioned in previous blogs, It's a very quick, easy and professional looking finish procedure. All that was left was to attach the hardware and organize my carving tools.


Wood Carving Tool Box and "Boot" carving Project


Sunday, May 8, 2011

Duniway School Portland, Oregon


I recently visited Portland, Oregon and thought it would be fun to visit a neighborhood where my family lived at one time. Duniway is where I attended 7th and 8th grade 52 years ago. I took my first shop class there and can still vividly remember the experience. We did some drafting, woodwork, and metalwork. The school no longer has a 7th and 8th grade, so the shop has been closed and is currently the band room. Otherwise, the school has changed very little.